9 August 2025
Furby 2012 1998 Eyes Mod
A picture-heavy guide for replacing the LCD eye look on a Furby 2012 or Furby Boom with 30mm doll eyes. You can leave the LCD backlight layer in place for glowing eyes, or disconnect the LCD parts if you want a simpler static-eye conversion.
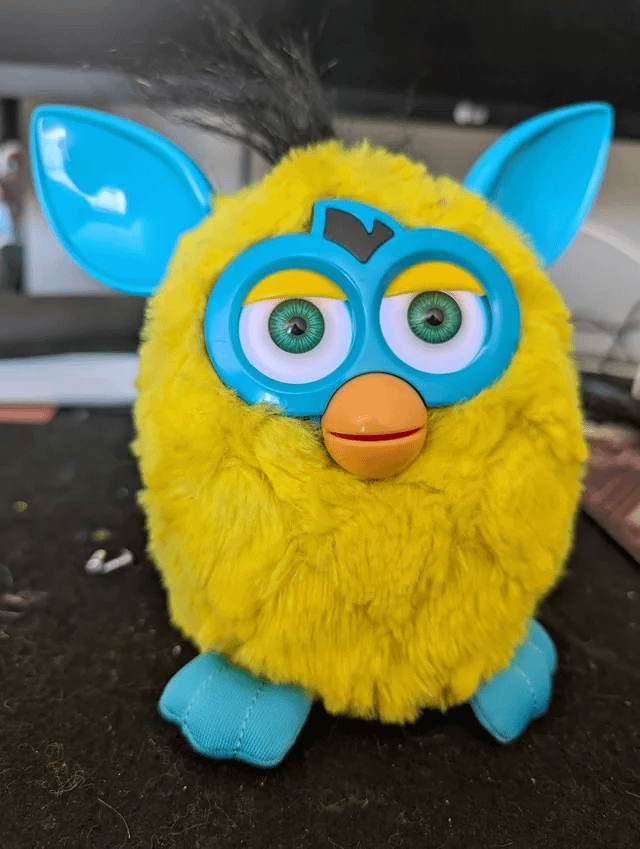
Parts Used
- Furby 2012 or Furby Boom
- 30mm doll eyes
- Small screwdrivers
- Long narrow tool for the ear tabs
- Patience for the mouth hook, plugs, and foil sensors
Before You Start
Remove the batteries first. The fur, touch sensors, speaker cable, encoder cable, motor cable, home button cable, and mouth hook can all get in your way. Take photos as you go and only peel back as much tape as you need.
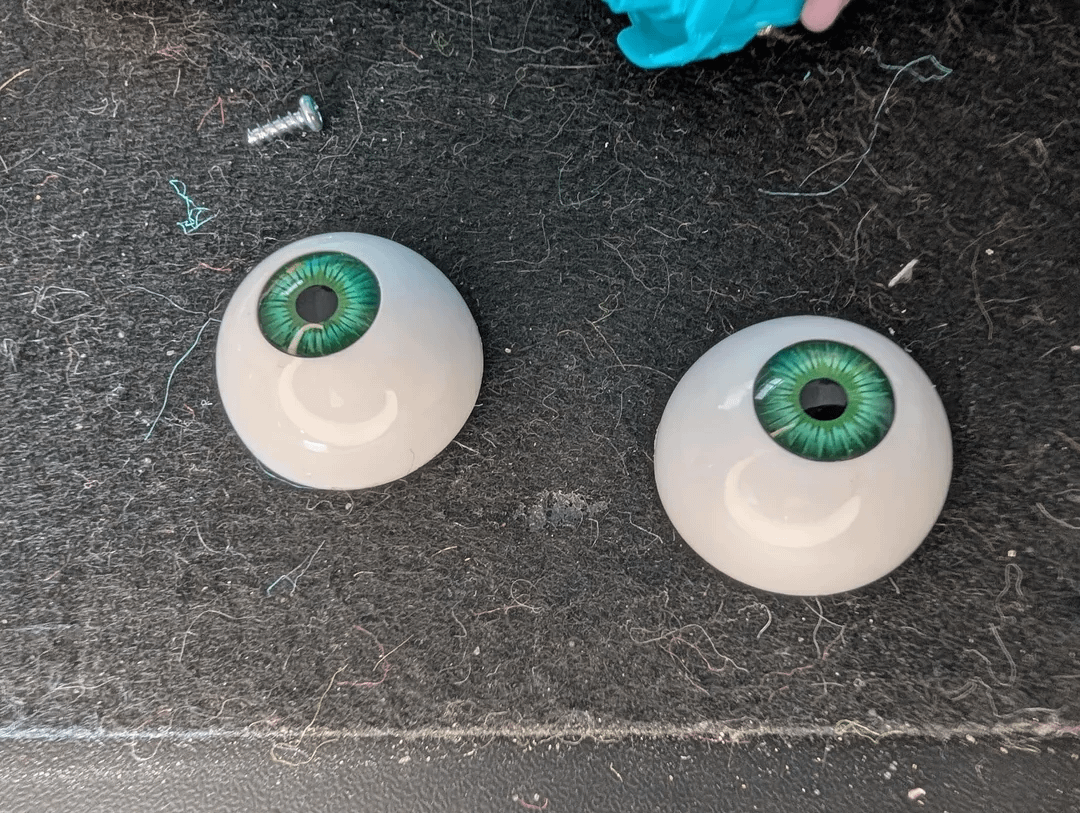
Pick the eyes
Search for 30mm doll eyes. They do not need to be the exact pair shown, but the size matters.
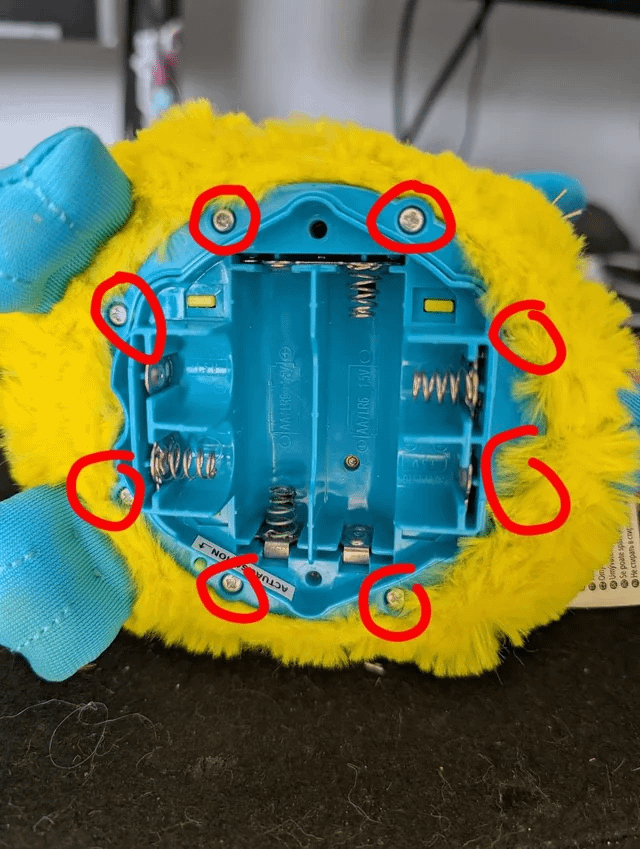
Remove the fur screws
Unscrew the battery compartment, remove the batteries, then remove the eight screws holding the fur down.
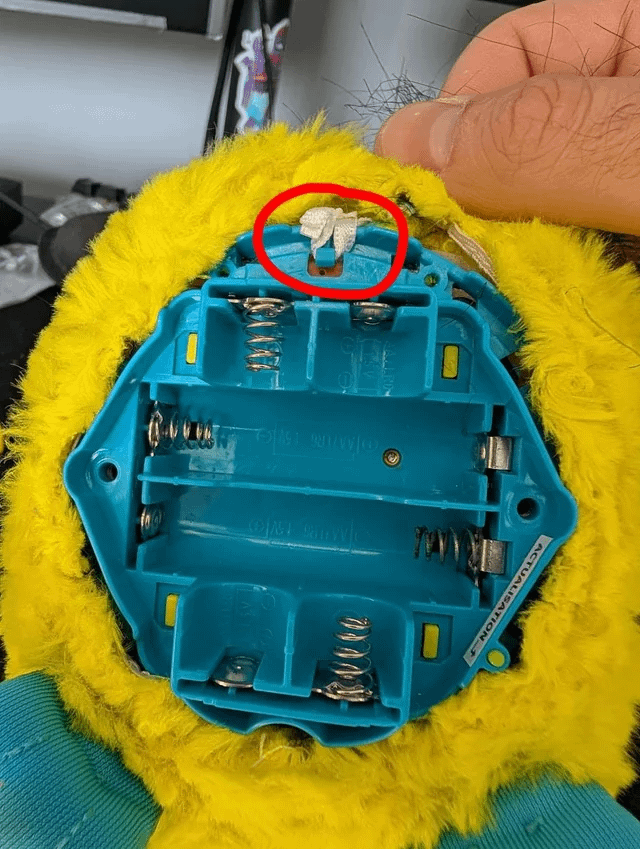
Unhook the tail
The tail is connected by a small fabric hook that triggers the tail button. Unhook it carefully before pulling the fur further away.
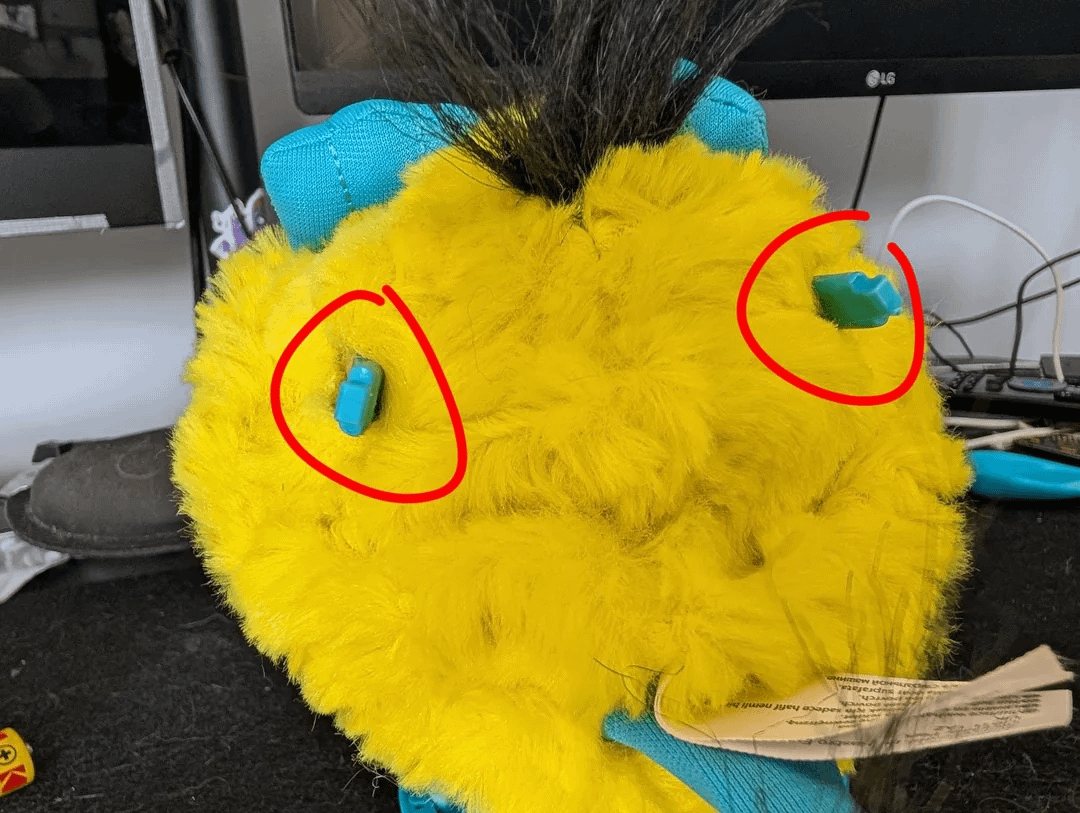
Release the ears and tabs
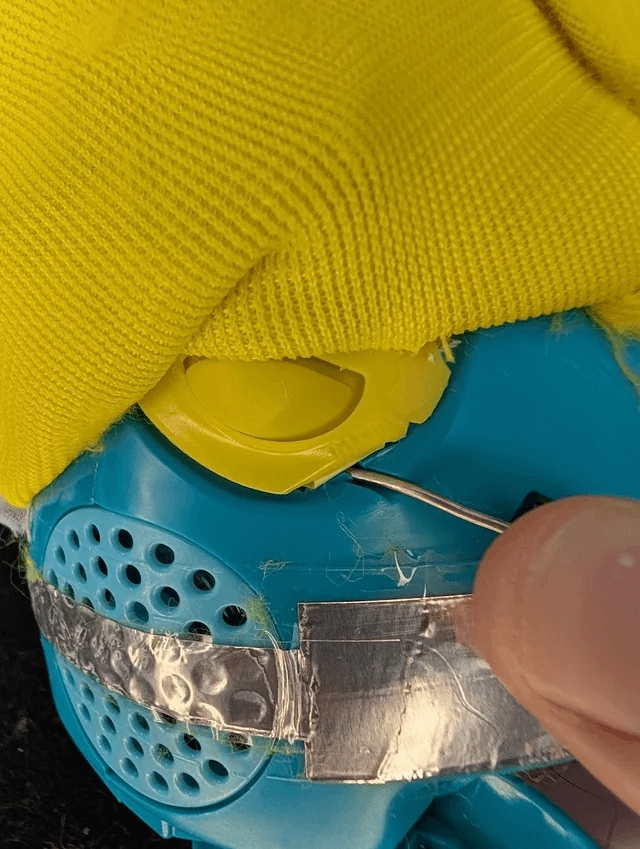
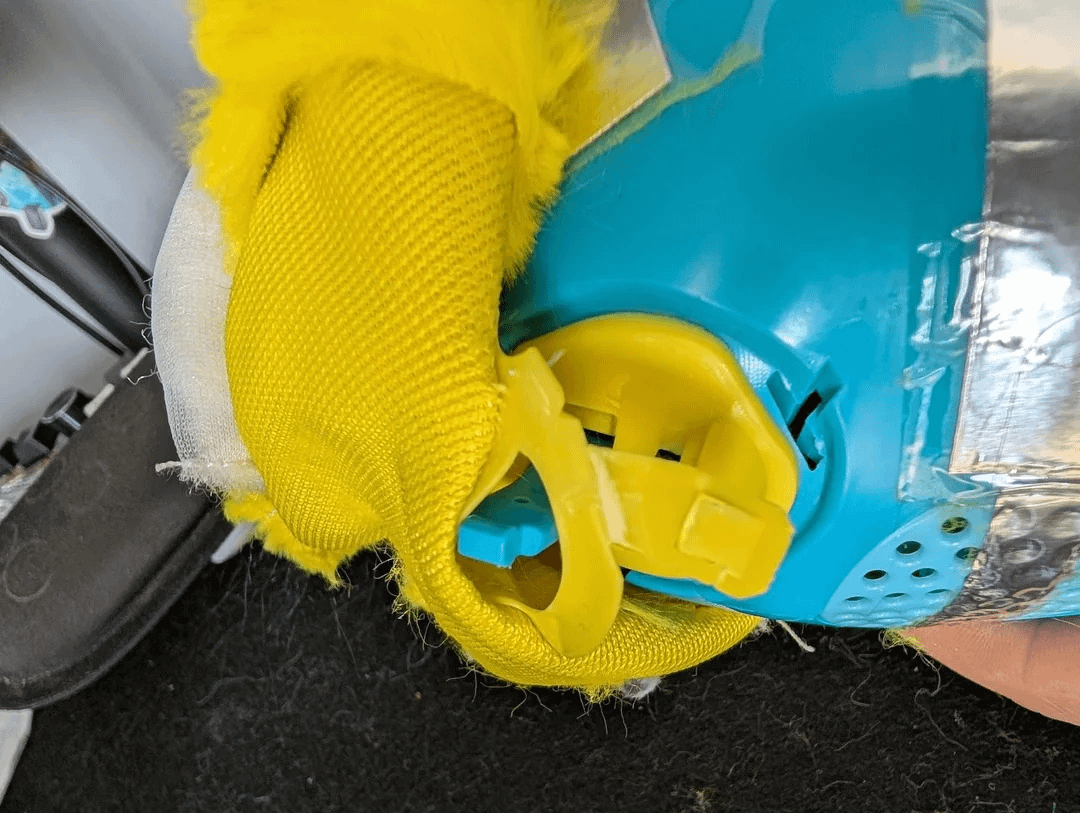
Remove the ears, then peel back the fur to reach the plastic ear tabs. The two closest tabs can be released with a long narrow tool through the hole.
Protect the foil sensors
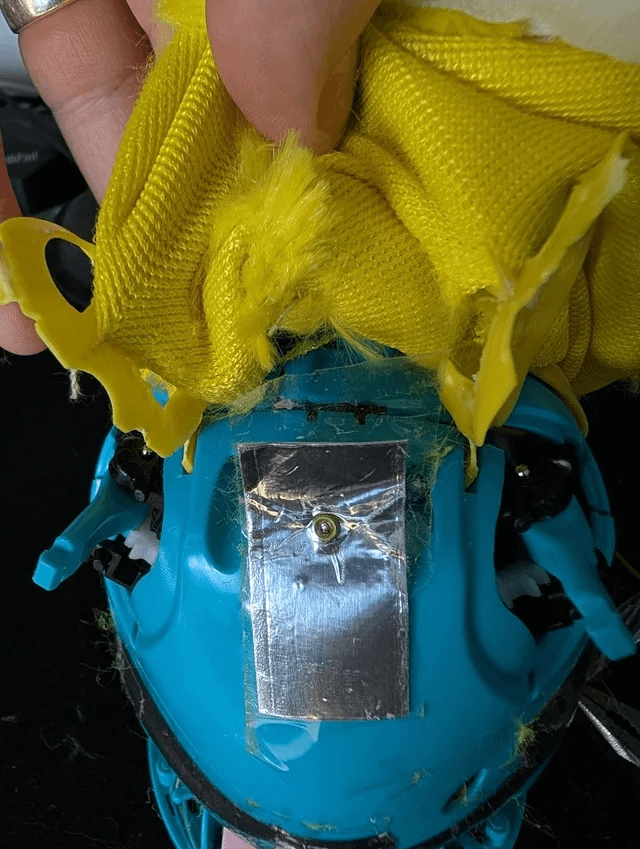
Carefully peel back the tape around the shell. Remove as little as possible because the foil strips are touch and petting sensors.
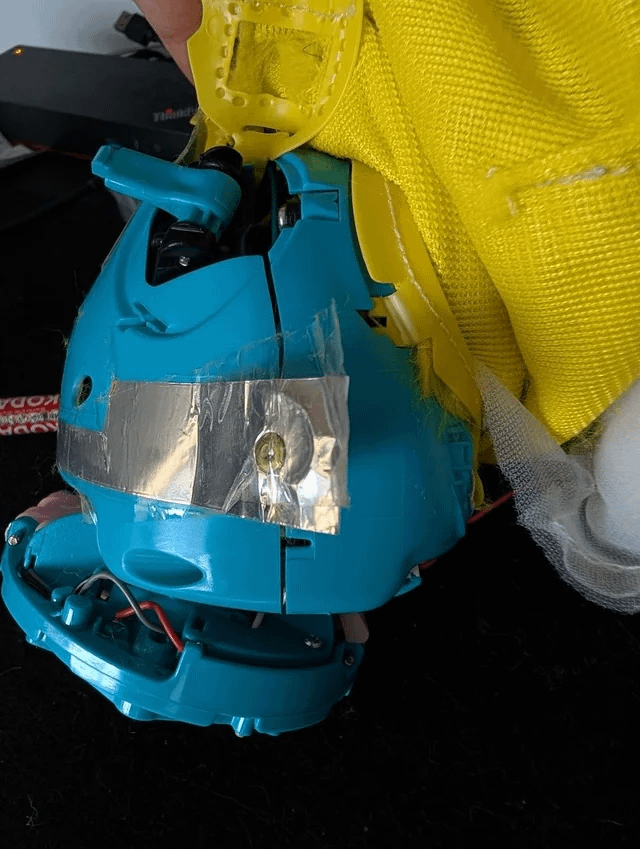
Remove the back shell
Remove the plastic pieces around the ears and the four screws holding the back shell in place.
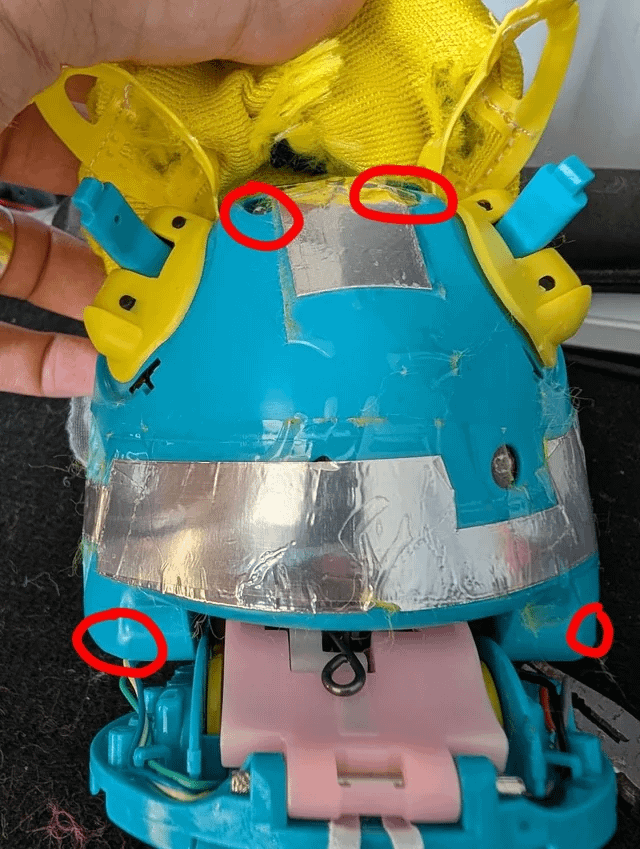
Disconnect the side wiring
On the speaker side, remove the marked screws and unplug the speaker. On the other side, unplug the home button, encoder, and motor cables.
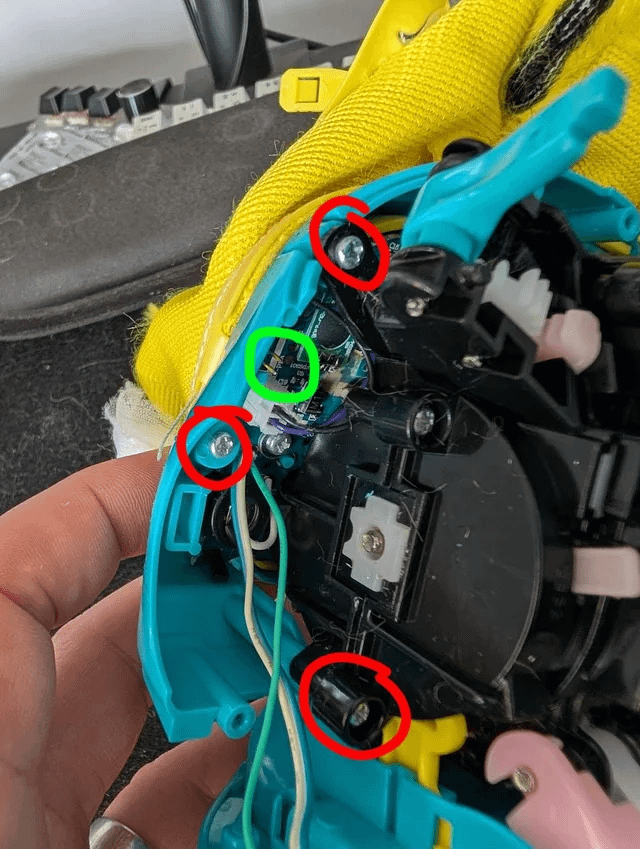
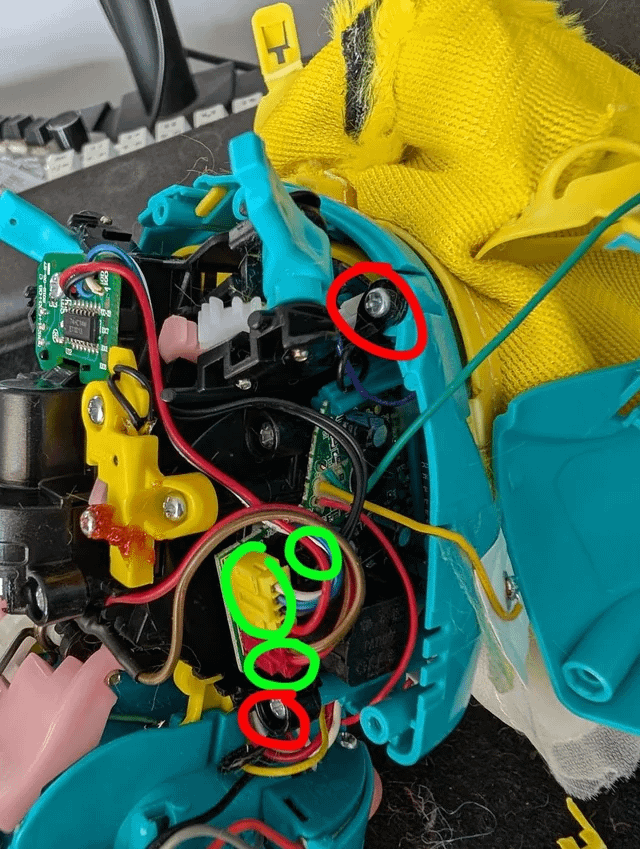
Free the front shell
Once the front shell is loose, remove the front screws and unplug the test-mode switch. Furby Boom shells tend to come away easier than 2012 shells.
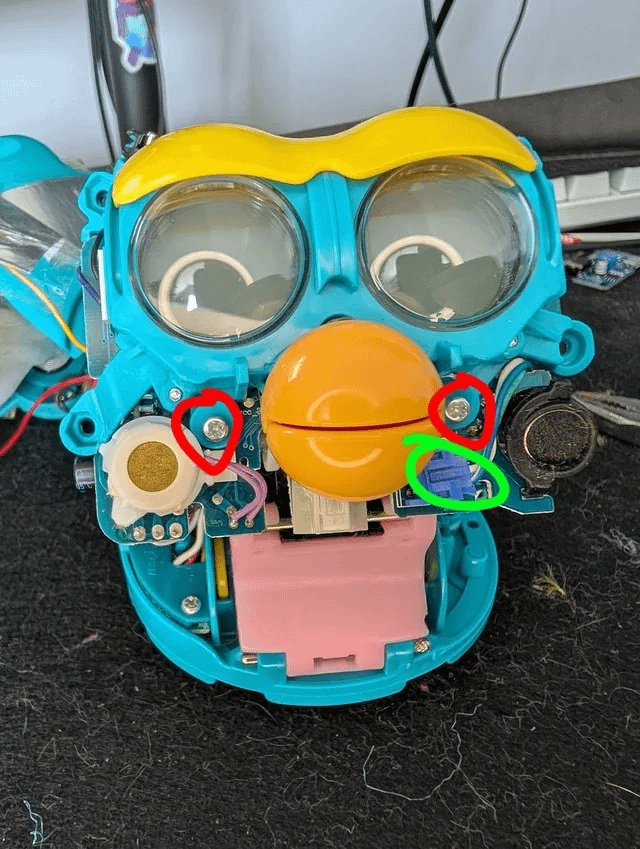
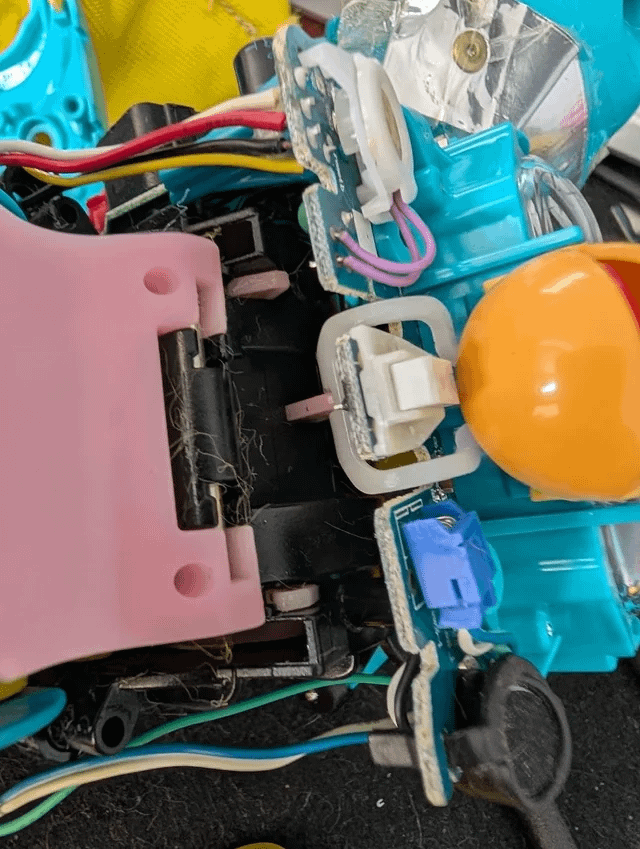
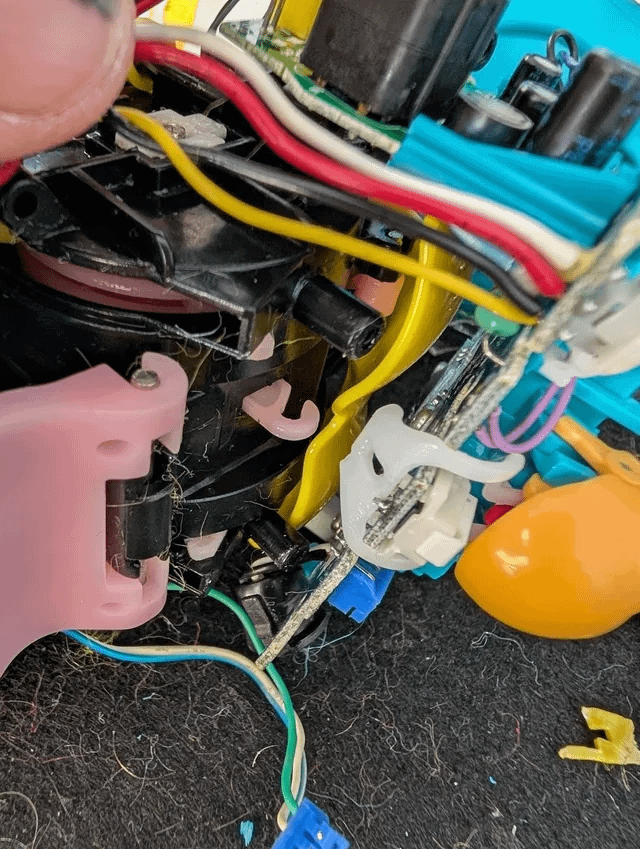
Unhook the mouth
The mouth hook holds the front assembly in place. This can be awkward; a small screwdriver helps push the hook up without forcing it.
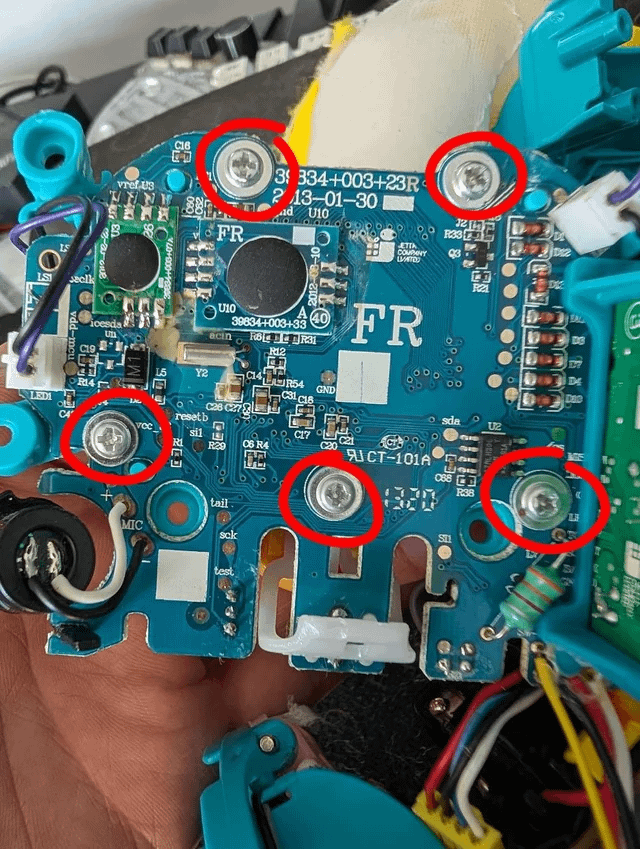
Remove the eye assembly screws
Turn over the PCB and remove the five screws holding the LCD eye assembly.
Choose lit or unlit eyes
For light-up eyes, remove the glass and pink plastic strips but leave the white LCD backing/backlight layer. For unlit eyes, you can unplug the LCD cables too.
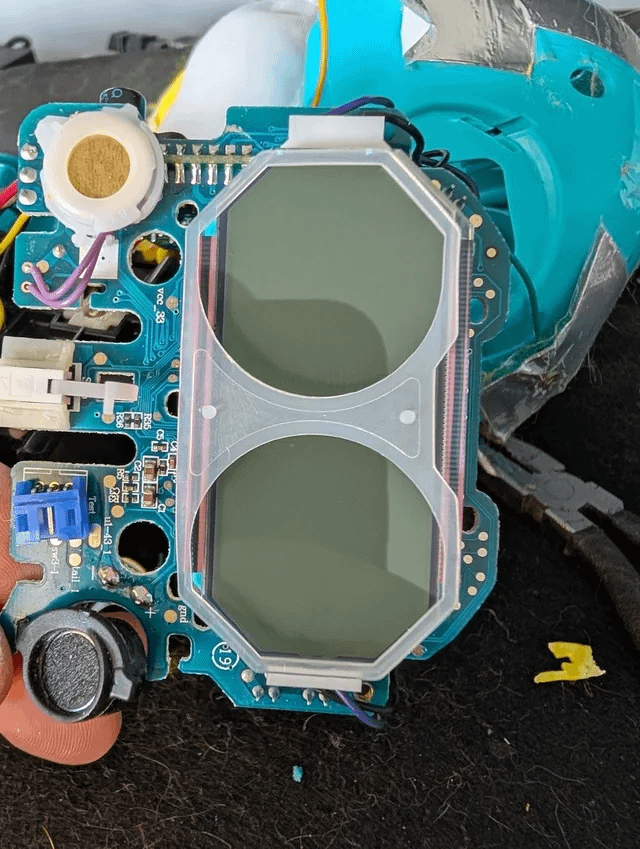
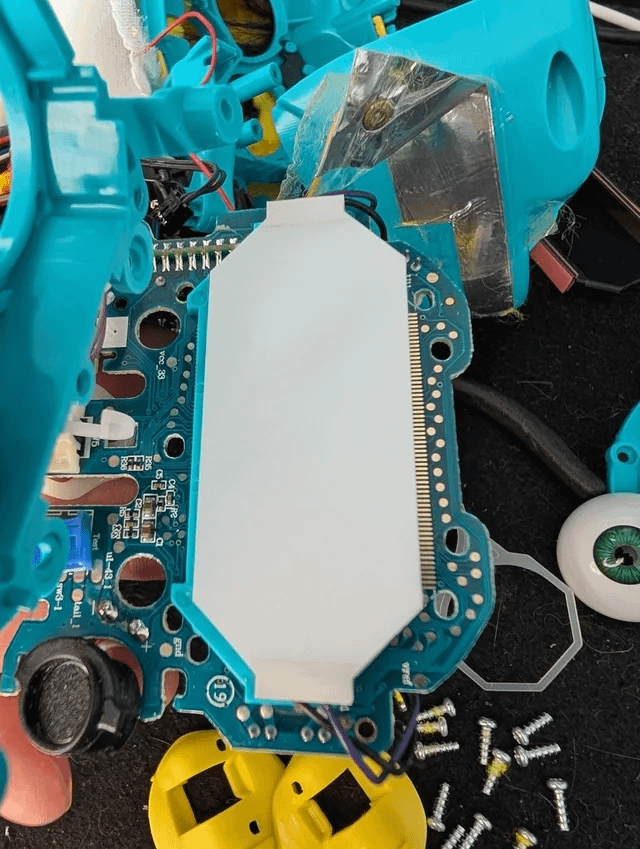
Fit the new eyes
Remove the clear plastic eye cover, place the doll eyes into position, line everything up, and screw the front LCD eye holder back on.
Reverse the steps to reassemble. Rehook the mouth, reconnect every sensor and plug, put the front ear tabs back before closing the shell, and remember the tail hook.
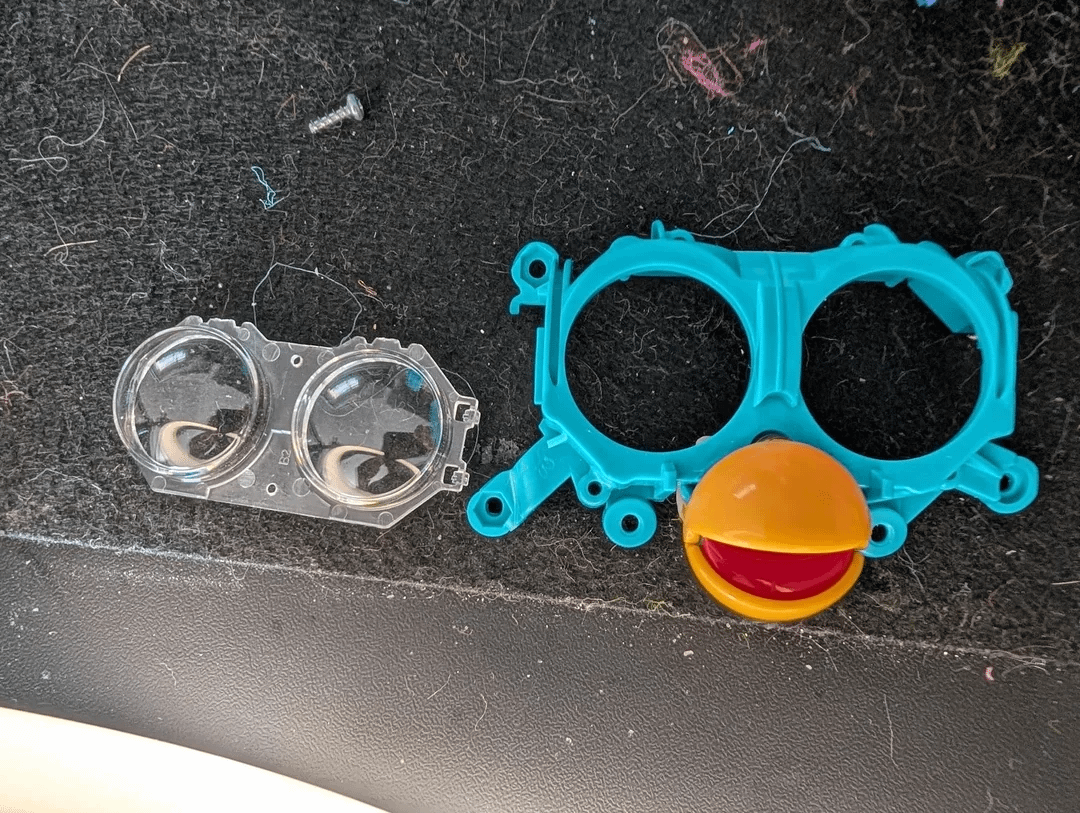
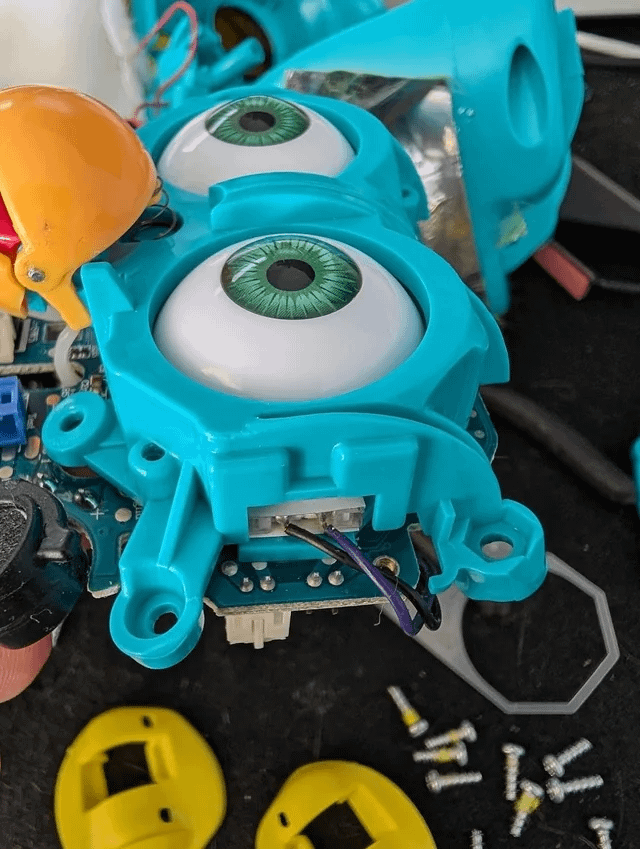
Source
This page is a local, cleaned-up version of my original Reddit guide, with the photos kept inline so the teardown is easier to follow.